
Writing Portfolio
My writing background includes in-house roles as both a Technical Writer and team lead at BYU-Idaho, freelance projects for private clients, and full-time work as an SEO Specialist and Copywriter at Melaleuca, a global health and wellness company based in Southeast Idaho. Along the way, I’ve crafted everything from employee spotlight features and product descriptions to video scripts, blog articles, social media campaigns, and internal communications.
I’ve written SEO-optimized blog content, developed messaging for outdoor survival brands, produced tech support content and documentation for university faculty and students, and created training guides to support large-scale software transitions. Whether the tone is casual, technical, or brand-forward, my goal is always the same: to create content that connects, informs, and drives results.
This portfolio showcases the range of my writing, from playful, voice-driven scripts to sharp, business-savvy communications. Feel free to browse and click through the sections below. And if you think we’d work well together, I’d love to hear from you.
Technical Writing
A collection of how-to guides, onboarding documentation, and process manuals created to demonstrate clarity, structure, and accuracy. These samples showcase my ability to translate complex tools and workflows into step-by-step instructions that are easy for any user to follow.
"Work-study Onboarding Guide – GitHub Desktop" 1.To start working in GitHub, download the GitHub desktop installer [https://desktop.github.com/download] and click on the button listed “Download for (operating system).” 2. Open the installer from your browser’s download tray, or the downloads folder. a. The program will automatically install, and then open. 3. Log in using your GitHub credentials. a. If you do not have an account with GitHub yet, you can Sign Up [https://github.com/signup] here. i. Enter your student email and then create a password, and username. ii. Choose a professional username, ideally based on your real name (e.g., jsmith or john.smith), or a recognizable nickname. b. If your department uses GitHub Enterprise, your manager will provide you with connection instructions. 4. Install a text editing program, to ensure you can make changes to files. a. It’s recommended to use Visual Studio Code. [https://code.visualstudio.com] b. Download and run the installer. c. Once installed, set Visual Studio Code as the default editor within GitHub Desktop by going to Files -> Options -> Integrations so that any files you open in GitHub Desktop will automatically launch in Visual Studio Code. 5. Access the repositories you need. a. Links/file paths to repositories that you will be allowed to work on will be provided to you by your manager once you successfully finish this guide. i. (Optional but highly suggested) Complete the tutorial if this is your first time using GitHub, so you get used to the process of creating/accessing branches, accessing files, and transitioning between GitHub and Visual Studio Code to do edits, then merging your edits in the file. 6. Clone a repository (make a local copy on your computer). a. In GitHub Desktop, click “File” -> “Clone Repository”. b. Select the repository provided by your manager (or choose the tutorial repository). c. Pick a local folder on your computer where the files will be saved, then click “Clone”. 7. Make a simple change. a. Open the repository in Visual Studio Code (right-click it in GitHub Desktop -> then click on “Open in Visual Studio Code”). b. Find the file called README.md (this is usually the project’s main description). c. Add a short line of text at the bottom (for example, your name, “Hello World”, or “This is my first edit!”). d. Save the file. 8. Commit and push your changes. a. Go back to GitHub Desktop. You’ll see your edit listed under “Changes.” b. Enter a short description in the Summary field (e.g., “Edited README.md”). c. Click “Commit to main” (or the branch you’re on). d. Click “Push origin” to upload your changes to GitHub.
AuthSample API Documentation This sample demonstrates my ability to create clear, developer-focused API documentation. While my original work is under NDA, I reproduced a representative example to showcase how I structure endpoints, parameters, and usage examples for technical accuracy and readability. Overview The AuthSample API is a lightweight authentication service that allows you to add secure user sign-up, login, token refresh, and password reset functionality to your application. Base URL: https://api.authsample.dev/v1 Authentication: All requests require an API key included in the request header. Header format: Authorization: Bearer Endpoints 1. Create Account POST /signup Creates a new user account. Request body (JSON): { "email": "user@example.com", "password": "SuperSecret123", "name": "Jane Doe" } email (string, required, unique) password (string, required, minimum 8 characters) name (string, optional) Sample request: curl -X POST "https://api.authsample.dev/v1/signup" \ -H "Content-Type: application/json" \ -H "Authorization: Bearer YOUR_API_KEY" \ -d '{ "email": "user@example.com", "password": "SuperSecret123", "name": "Jane Doe" }' Sample response (201 Created): { "user_id": "abc123", "email": "user@example.com", "created_at": "2025-09-22T10:00:00Z" } 2. Log In POST /login Authenticates a user and returns an access token. Request body (JSON): { "email": "user@example.com", "password": "SuperSecret123" } Sample response (200 OK): { "access_token": "eyJhbGciOiJIUzI1...", "expires_in": 3600, "token_type": "Bearer" } 3. Refresh Token POST /refresh Refreshes an expired token. Request body (JSON): { "refresh_token": "oldRefreshToken123" } Sample response (200 OK): { "access_token": "newAccessTokenHere", "expires_in": 3600 } 4. Reset Password POST /reset-password Sends a password reset email to the user. Request body (JSON): { "email": "user@example.com" } Sample response (200 OK): { "message": "Password reset email sent to user@example.com" } Error Codes 400 Bad Request → Missing or invalid parameters. 401 Unauthorized → Invalid or missing API key. 403 Forbidden → User not permitted. 404 Not Found → Endpoint or resource doesn’t exist. 500 Internal Server Error → Server-side issue. Best Practices Always store your API key securely (never expose it in client-side code). Handle 401 Unauthorized errors by checking if your token has expired and refreshing it. Rate limits may apply, retry failed requests with exponential backoff.
Setup Guide: Visual Studio Code (VS Code) Overview Visual Studio Code (VS Code) is a lightweight, open-source code editor developed by Microsoft. It supports debugging, task running, and version control, and integrates seamlessly with GitHub Desktop. This guide walks you through installing and setting up VS Code so you can open repositories, edit code, and commit changes directly to GitHub. Prerequisites Before you begin, make sure you have: A computer running Windows 10 (or later), macOS, or Linux Internet access GitHub Desktop installed and configured (see Getting Started with GitHub Desktop guide) A GitHub account Step 1: Download Visual Studio Code Go to the official download page: https://code.visualstudio.com/ Choose your operating system (Windows, macOS, or Linux). Download the installer package. Step 2: Install Visual Studio Code Windows Open the downloaded .exe file. Accept the license agreement. Select Add to PATH (recommended). Choose default options and complete the installation. macOS Open the downloaded .zip file. Drag the Visual Studio Code.app icon into your Applications folder. Open the application. (Optional) Add VS Code to your system PATH by pressing Cmd + Shift + P in VS Code, typing “Shell Command,” and selecting Install 'code' command in PATH. Linux (Ubuntu/Debian) Run the following commands in your terminal: sudo apt update sudo apt install code Step 3: Connect VS Code to GitHub Desktop Open GitHub Desktop. Clone or open a repository. From the top menu, select Repository > Open in Visual Studio Code. VS Code will launch automatically with your project files. Tip: If the option doesn’t appear, go to File > Options > Integrations in GitHub Desktop and confirm that “Visual Studio Code” is selected as your default editor. Step 4: Customize VS Code Make the editor fit your workflow: Install Extensions: Click the Extensions icon on the left sidebar and search for popular tools such as: Prettier – Code Formatter GitLens – Git supercharged Python, C#, or Markdown All in One (depending on your language) Change Theme: Go to File > Preferences > Color Theme to customize your look. Set Auto Save: Go to File > Auto Save to automatically save changes as you type. Step 5: Verify Your Setup Open a repository in VS Code. Edit a file and save your changes. Return to GitHub Desktop — you should see your changes detected automatically. Commit and push to GitHub to confirm everything is working correctly. Troubleshooting Issue Possible Cause Solution VS Code not launching from GitHub Desktop Integration not configured In GitHub Desktop, go to File > Options > Integrations and reselect VS Code Terminal command code not recognized VS Code not added to PATH Reinstall or use “Install 'code' command in PATH” inside VS Code Extensions not installing Network restrictions or proxy settings Check your internet connection or system proxy configuration Next Steps Explore VS Code’s official documentation. Try cloning, editing, and pushing changes to a test GitHub repository. Install recommended extensions for your language or framework. Summary You’ve successfully installed and configured Visual Studio Code. You can now edit code, view version history, and collaborate using GitHub Desktop, all from one connected workflow.
New Employee Onboarding SOP Department of Information Technology Purpose This Standard Operating Procedure (SOP) outlines the process for onboarding new employees within the Technology Department. It ensures that every new team member has the required system access, software, and equipment by their first day of work. Scope This procedure applies to all new full-time, part-time, and student employees in the IT Department. It covers coordination between HR, the hiring manager, and IT support for account setup, equipment provisioning, and orientation scheduling. Responsibilities Hiring Manager Initiates onboarding request and confirms employee start date. Submits required employee information to HR and IT. Verifies access and equipment before the employee’s first day. Human Resources (HR) Processes new hire paperwork and creates personnel records. Provides employee ID and employment details to the IT Department. IT Department Creates system accounts (network, email, and department-specific platforms). Prepares workstation, installs required software, and ensures proper functionality. Provides new employees with initial system credentials and instructions. New Employee Completes all HR onboarding documentation prior to start date. Attends orientation and verifies access to all required systems. Procedure 1. Manager Submits Onboarding Request The hiring manager completes the “New Hire IT Access Request” form at least one week before the employee’s start date. The form includes the employee’s name, position title, department, start date, and role-specific software or system access needs. 2. HR Processes Employee Profile HR receives the onboarding request and processes employment paperwork. Once complete, HR sends the employee’s information (name, NetID, employee ID) to the IT Department. 3. IT Creates Accounts and Permissions IT staff create the following accounts: University/Faculty email address (firstname.lastname@(school).edu) Network login credentials Access to department-specific systems (e.g., ServiceNow, GitHub Enterprise, or internal project tools) IT documents all created accounts in the internal Access Management Tracker. 4. Workstation Preparation IT prepares the employee’s assigned workstation or laptop. Installs required software such as: Microsoft Office 365 Zoom Microsoft Teams OneDrive IT performs quality checks to ensure all software launches correctly and network access is verified. Any software required for the employee’s job responsibilities will be handled by the employee themselves, under the direction of their hiring manager on their first day as each role requires different software. 5. Orientation and Equipment Handover On the employee’s first day, IT provides: Workstation or laptop and peripherals Login credentials and password reset instructions Brief walkthrough of department systems and security policies The hiring manager introduces the employee to the department and confirms that all access and tools are functional. 6. Verification and Sign-Off The hiring manager completes the “IT Access Verification Checklist” to confirm: All systems are accessible Equipment is functional The employee understands login procedures and data policies The signed checklist is returned to IT for recordkeeping. Related Documents New Hire IT Access Request Form IT Access Verification Checklist Acceptable Use and Data Security Policy Revision History Version Date Description Author 1.0 mm/dd/yyyy Initial SOP Creation Hayden Searle
Connecting to the VPN (Windows and macOS) Overview This article walks you through how to connect to the campus Virtual Private Network (VPN). A VPN allows you to securely access internal systems and resources when working remotely. Prerequisites Before you begin, make sure you have: An active campus network account (username and password) The GlobalProtect VPN client installed on your computer A reliable internet connection If you do not have GlobalProtect installed, contact IT Support or visit the Software Center to install it before proceeding. Connecting on Windows Open GlobalProtect Click the GlobalProtect icon in your system tray (bottom-right corner). If you don’t see it, open it manually from the Start Menu --> GlobalProtect. Enter the Portal Address When prompted, type: vpn.byui.edu Click Connect. Sign In Enter your username (do not include “@byui.edu”). Enter your password and click Sign In. Verify Connection When connected, the GlobalProtect icon will display a shield with a checkmark. You are now connected to the VPN and can access internal systems like Workday, the network drives, or secure applications. If your connection drops or times out, open GlobalProtect again and click Reconnect. Connecting on macOS Open GlobalProtect Click the GlobalProtect icon from the top menu bar. Enter the Portal Address Type: vpn.byui.edu Click Connect. Sign In Enter your campus credentials and click Sign In. Verify Connection Once connected, the GlobalProtect icon will show a checked shield. You now have access to campus systems and resources. Troubleshooting Issue Possible Cause Solution Can’t connect to VPN Incorrect credentials or expired password Try logging into another campus service to verify your credentials. Reset your password if needed. Connection keeps dropping Unstable internet connection Move closer to your router or switch to a wired connection. “Portal not found” error Incorrect VPN address Double-check that the portal address is vpn.byui.edu. GlobalProtect missing Client not installed Install from Software Center (Windows) or BYU-Idaho’s software page (Mac). Additional Resources Password Reset Portal (link) Install the GlobalProtect VPN Client (link) Contact IT Support (link) Summary Once connected to the campus VPN, your device will have secure access to all necessary systems and resources, just as if you were working on campus.
AuthSample API v2.0 – Release Notes Release Date: mm/dd/yyyy Version: 2.0 Overview AuthSample v2.0 introduces new features, enhancements, and bug fixes to improve authentication workflows and developer experience. This release builds on the core functionality of the AuthSample API, providing more secure, flexible, and user-friendly endpoints for managing user accounts. New Features Two-Factor Authentication (2FA) Support Endpoint: POST /2fa-enable Allows developers to enable 2FA for users to enhance account security. Sample request/response included in the updated API reference. User Role Management Endpoint: POST /roles & GET /roles Assign and retrieve user roles programmatically. Supports role-based access control for applications using the AuthSample API. Email Verification Workflow Endpoint: POST /verify-email New functionality to trigger verification emails for newly registered users. Reduces account fraud and improves compliance with security policies. Enhancements Improved Token Expiration Handling /refresh endpoint now supports automatic refresh of tokens up to 24 hours after expiration. Expanded Error Messages Error codes now include additional context for easier debugging and faster integration. Documentation Updates The AuthSample API reference now includes detailed examples of each new endpoint and updated code snippets. Bug Fixes Resolved an issue where /signup occasionally returned duplicate user IDs. Fixed intermittent 401 errors during login for accounts with special characters in passwords. Corrected the /reset-password workflow to reliably send emails to all valid addresses. Known Issues POST /2fa-enable may fail with legacy accounts that were created prior to v1.5. Contact support for migration steps. Some API clients may need to update their Authorization headers after the v2.0 release to accommodate enhanced token handling. Getting Started Developers can continue using the base URL: https://api.authsample.dev/v2 All endpoints remain protected by API Key authorization: Authorization: Bearer For complete usage examples and updated JSON payloads, refer to the AuthSample API v2.0 Documentation. Support For assistance, contact AuthSample Developer Support at: Email: devsupport@authsample.dev Documentation Portal: https://authsample.dev/docs
Marketing Writing
A mix of promotional content and email campaigns that did as part of a freelance writer for a magazine called "Steel to Reel", and then some student marketing materials. These samples highlight my voice as a conversion-focused copywriter with a knack for adapting to tone, audience, and purpose.
“Do You Have All Your Survival Bases Covered?” Think you’ve got your bug-out bag ready? Don’t leave survival to chance. Each month, Steel to Reel delivers 4–5 expertly curated tools, ranging from water filtration to shelter essentials. With themed gear selected by real outdoor survivalists, you'll always be one step ahead. (Wrote for a male prepper audience 35–55+. Focused on conversion through urgency, credibility, and a benefit-driven CTA.)
"Prepping is a Woman’s Game" Prepping isn’t just for the guys. Whether you're building your first kit or adding to your arsenal, Steel to Reel equips you with sleek, easy-to-use survival tools—and clear instructions for using them. Every month delivers confidence, preparedness, and peace of mind. (Targeted toward younger female survivalists new to prepping. Focused on accessibility and empowerment.)
Print Shop Pro Promotions Are you needing a particular project to look professional, or something just a cut above what can come out of the self-service printers on campus? Try the new Print Shop Pro website, a service from Express Print & Copy! With Print Shop Pro, you don’t have to stand in line to order prints, and you can print just about anything, right from your own home! You’ll be able to pick up your prints on campus after you are notified that they are done. Try it today at press.byui.edu! Finals, papers, and big presentations can leave you up until the middle of the night if you aren’t prepared. Worry about one less thing by using the new Print Shop Pro website, a service from Express Print & Copy, to prepare for your presentations and make your papers look professional. Print Shop Pro allows you to send in your documents from home, get them printed, and have them ready for pick-up on campus once you are notified that they are complete! Check it out at press.byui.edu. Going on campus is harder given the current circumstances. It’s much easier and safer to stay home. So, if you need to print something professionally, wouldn’t it be nice if there was an option to print things to be picked up on campus, but from the safety of your home? Try the new Print Shop Pro from Express Print & Copy today to order high-quality prints from your favorite spot on the couch! You’ll be able to pick up your prints on campus after you are notified that they are done. To get there, visit press.byui.edu. Hearing wedding bells in your future? Have a big art submission and need to ensure your print looks good? Giving a presentation that needs to look professional? Try the new Print Shop Pro website from Express Print & Copy! They can help you print more than just homework; they can help you print wedding announcements, banners, pictures, booklets, posters, Canvas pictures, and more, all from the comfort of your own home! If you want to give it a try, visit press.byui.edu. Students now can print materials straight from Canvas, including pictures and documents, using the “Print Materials” button displayed in your on-campus Canvas courses. Print orders can be picked up on campus at Express Print & Copy.
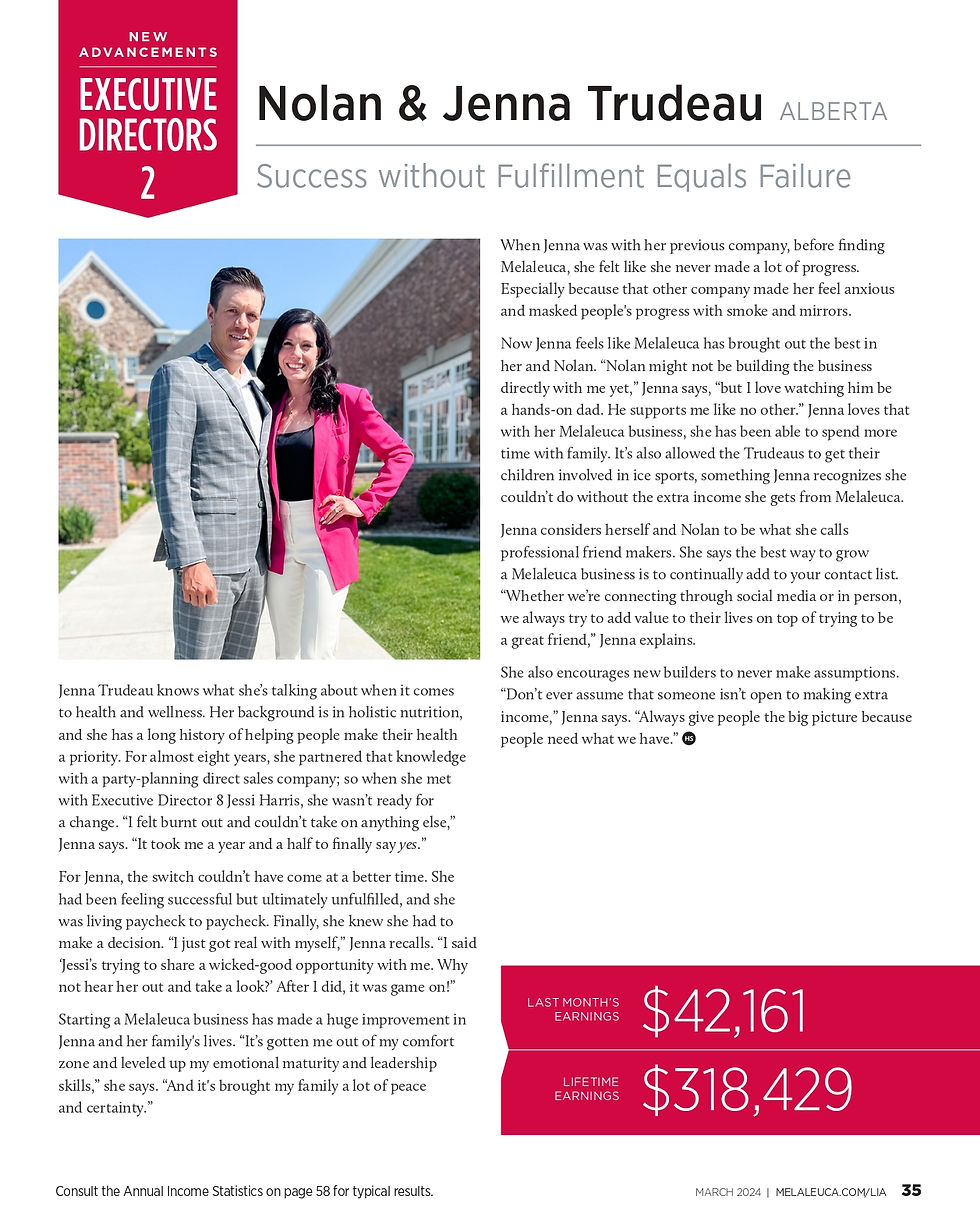
This section of my marketing writing is a curated selection of my work that I did while as a Copywriter at Melaleuca. The articles in this gallery are a good representation that I try to understand where brand, clarity, and persuasion meet. I wrote for a variety of audiences and formats, from executive highlight articles, business-focused articles, consumer-focused product highlights, and ad copy. This portion of my portfolio includes handpicked pieces that I feel best reflect my range, voice, and ability to communicate clearly in a fast-paced, brand-driven environment.


Script Writing
A collection of engaging, voice-driven scripts written for video and social media. These scripts were created as part of a student tech awareness campaign while I worked as a Copywriter at BYU–Idaho. Each piece was designed to simplify complex tech topics and increase engagement through storytelling, humor, and visual direction. While these represent just a handful of the 100+ scripts I’ve written, they showcase my ability to craft narrative-driven content that educates and entertains.
Technology is Wild [A student is sitting at a table/desk with a laptop in front of him and all sorts of papers, wires, and the like covering the surface of the table and poking out of his bag that is sitting at his feet. He looks confused and worried as all sorts of warnings pop up on his computer screen. His name is seen written on his bag, or on a paper, or even on a nametag if nothing else. It says Chris.] NARRATOR: (a la David Attenborough) Technology is a wild beast just waiting to be tamed. Here we spot an enchanting college creature: Christopher. He has been accosted by some predatory technology issues. How is young Christopher to survive? [Chris is shown calling the Service Desk on his phone. The technician on the other end of the phone motions for Chris to come in person. We see Chris walking up to the Help Desk in the MC, holding his laptop. He swipes his I-Card and his “information” shows up on the queue screen above the desk.] NARRATOR: Christopher seems to be instinctively calling the I.T. Service Desk at (208) 496-1411 to see if they can help him. Live Chat is another way some college creatures could respond to this situation as well, in my experience. Oh! It appears the desk can help! Now Christopher is carrying his computer to the I.T. Service Desk mammals to wrangle some assistance with the major wild issues. [A help desk technician gives Chris a thumbs up. The scene changes, and we are back in Chris’ room. Things are looking a little bit more picked up and orderly on the desk and in his bag. Chris’ computer has a few less warnings that are popping up. He then opens his web browser and navigates to the IT website.] NARRATOR: The benevolent technician has proposed that Christopher investigate the I.T. website to uncover some tutorials that might aid him in evolving to fix minor problems on his own. [We see Chris from the front, behind his computer. A “connection” opens between Chris and a technician. The technician slides into frame, and Chris slides over to allow them both to share the screen. The technician is sitting behind their own computer and typing back and forth to Chris. Whatever they “type” appears in a bubble above the connection line. The conversation is brief, and then the technician slides out of frame again.] NARRATOR: Way to go, Christopher! If you are indeed like Christopher, and need technology support, call, chat, or meander on in! To learn more, visit the vast expanse of the Information Technology website at www.byui.edu/it. We’re at your service, in all our variety! [Chris holds up a thumbs up, and smiles. End Slate.]
Technology Problems Scene 1: A neighborhood street, in the middle of the road. The sky is dark red and filled with clouds. There is a monster in the road, and a student is standing with their back to the viewers at the feet of the monster. The monster looks like it’s moving in on the student. On Screen Text: Virus problems? We get IT, and so can you! Scene 2: A zoomed in view on just the student. An IT employee appears next to the student. They have a sword in each of their hands. The employee then hands the extra sword to the student, and the two of them rush off to attack the monster. Scene 3: The IT employee is sitting behind his desk. He’s wearing a phone headset and talking to someone. Hanging on the wall beside him, we see the sword he used to help the student. On the other end of the line is the student, and they have their computer under control.
Slow Computer Scene 1: A student is walking through a jungle environment, when suddenly they freeze, and begin to sink into the ground. They are caught in quicksand, and look sad, and frightened. On Screen Text: Slow computer? We get IT, and so can you! Scene 2: A vine appears and is thrown over the student’s hand. The student takes it and climbs out of the sand pit. They crawl over to see their rescuer; it is an IT employee, and they are wearing some sort of “adventurer” gear, (maybe like an “Indiana Jones” style hat). Scene 3: The IT employee is standing at the Service Desk. A small sandcastle is built next to him. The student from earlier appears and brings their computer. The student looks worried. The student hands over their computer to the technician. On Screen Text: Visit the I.T. Service Desk (located in the MC)! To learn more visit http://www.byui.edu/it.
Connecting to Wi-Fi and Our Social Media Scene 1: A student is stumbling through a dark room looking for something. They move a little in one direction and hit their knee on a table. They shuffle through some papers on the table before growling in exasperation. On Screen Text: Can't find Wi-Fi? We get IT, and so can you! Scene 2: The beam of a flashlight enters the scene, along with a smiling IT employee. The employee hands the student a flashlight. They skim the room with their lights and quickly find the student’s backpack. Scene 3: We find the employee back in our world, with a flashlight sitting on the corner of their desk. They post on social media that the wi-fi is down and when it’ll come back on. On Screen Text: We’ll keep you posted. Follow us on Facebook, Instagram, and Twitter.
Social Media Writing
A selection of social media content created for the BYU–Idaho I.T. Department across Facebook, Twitter, and Instagram. These posts supported tech initiatives, promoted student resources, and highlighted relevant historical figures and cybersecurity best practices, all with the goal of making technology approachable, engaging, and fun. During my time in this role, I increased engagement, impressions, and page followers by crafting posts that were timely, voice-consistent, and audience-aware.
Technology is Wild Technology is a wild beast just waiting to be tamed. I.T. is here for you so your tech issues don’t run rampant. Live Chat with us, call us up, or come see us at the I.T. Service Desk so we can find tech solutions for you! www.byui.edu/it. #itbyui #itservicedesk #livechat #techsupport #informationtechnology #technology #solutions
Cybersecurity Awareness Month – Antivirus Hand sanitizer has become an essential tool recently; if you don’t clean your hands, you’re putting yourself at risk for all sorts of sicknesses. If you don’t have an antivirus program on your computer, you’re putting yourself at risk for all sorts of digital viruses. To learn more about quality antivirus programs, check out our Tech Guides: https://techguides.byui.edu/a/1156260-antivirus-software-tips. #itbyui #byui #rexburg #cybersecurityawarenessmonth #technology #antivirus
Nikola Tesla Highlight Happy birthday to Nikola Tesla (born July 10)! He helped pioneer the alternating current used in electrical outlets. He also thought of ideas for other inventions, like electrical devices without wires. Without Nikola, we might not have the wireless technology we do today! If you need help connecting to the wireless networks around you, visit this Tech Guide on the BYU-Idaho I.T. website: https://techguides.byui.edu/m/92164/c/309034! #ITBYUI #byui #Rexburg #nikolatesla #electricity #pioneer #technology #wireless #WiFi
How to Print on Campus Picture this: You’re rushing to class, and you are close to being late. But wait! Did you remember to print out all the things that you needed for class? Oh, but class is starting soon, so you won’t have time to send everything to one of the print stations. Next time send your documents wirelessly to the print station before you even set foot on campus. Then print your materials from any of the print stations on campus! It’s that easy. To learn more about how to wirelessly print, check out our Tech Guide: https://techguides.byui.edu/a/1155939-wireless-printing-with-pharos-print. #byui #itbyui #rexburg #printing #campus #technology #wireless
Don’t Be Fooled Hey, click her for free $$$! Just folow the link...April Fools! While you were probably not fooled by this, scams are no laughing matter. So, be sure to learn how to best protect yourself against being fooled by some of the most common phishing, social engineering, and spam attacks. If it seems too good to be true, like offering something valuable for free, or is riddled with spelling errors, then it is probably a scam. To learn more about the signs of a scam, check out our Tech Guides for more information (it’s OK to follow this link...we promise) https://techguides.byui.edu/m/92164/c/309031. #BYUI #ITBYUI #rexburg #technology #phishing #cybersecurity #security
Technology Throwback Thursday Software installation at Ricks College was tedious in 1994; it required hours of constant work. And computers only had two ways to install programs: via a floppy disk or CD-ROM. Now, installations are done several at a time, and without any disks! We're so proud of the technological advancements BYU-Idaho has made over the years! #tbt #throwback #ITBYUI #BYUI #byuidaho #ricks #rickscollege #rexburg
Business Writing
A selection of business communications written for university-wide software rollouts, security initiatives, and platform transitions. These messages were crafted for varied audiences, including faculty, staff, and students, and were distributed through email, campus announcements, internal portals, and printed collateral. My role often included translating complex IT processes into clear, actionable steps while maintaining accuracy and tone alignment across all channels.
Duo 2FA Notifications Over the next few months, students will be enrolled in Duo, a 2-Factor Authentication service to add an extra layer of security to BYU-Idaho accounts. Please monitor your email inbox to learn your exact enrollment date and additional information about enrolling in 2FA, https://techguides.byui.edu/m/92156 2-Factor Authentication can be easily done with the Duo Mobile app that’s available for all mobile devices completely free! Just set up a "Duo Push" notification on your phone that you can quickly accept. Learn how, https://techguides.byui.edu/a/1152348-installing-the-duo-mobile-app-on-android-and-apple When using 2-Factor Authentication, don't forget to check the "Remember Me for 30 Days" box before authenticating. That way you don't have to authenticate for another 30 days! To learn more, check out this article. Learn more, https://techguides.byui.edu/a/1183782-the-remember-me-for-30-days-button I.T. is here to help you with 2FA! If you want to learn more about 2FA, Visit the I.T. website’s 2FA tutorials, to learn more, please follow this link: https://techguides.byui.edu/m/92156. If you still need help, you can call the I.T. Service Desk at (208) 496-1411, use Live Chat on the BYU-Idaho website, or stop by the Help Desk in the MC As a freshman, you’ll learn a lot your first semester here. The first lesson you should learn is that Duo Mobile app is the best and fastest way to access your account. The Duo Mobile app is BYU-Idaho's tool to help your private information remain private. Download Duo today! Faster than a speeding freshman on their way to class, more powerful than a spiritual devotional address, able to help you access your account the quickest and easiest! Yes, it’s...Duo! Duo Mobile sends you a push when you authenticate, which is the fastest way to access your account. Download Duo today! If you are wondering why we need Duo, it’s because your personal university information can be accessed both on and off campus. So, we use Duo to ensure your information is more protected than Fort Knox, the Crown Jewels, or maybe even Granite Mountain! Duo giving you trouble…? Call the experts who can help! Contact Tech Support at (208) 496-1411, connect with them using the Live Chat feature on the BYU-Idaho website, or use some of I.T.’s Tech Guides to troubleshoot basic issues. Class schedule? Check. Textbooks? Check. Duo Mobile? As a new freshman, you have a lot to remember your first day of classes. Duo is BYU-Idaho's tool to guard access to your account, so don’t forget to download it for your mobile device! If you need help setting up Duo, check out this Tech Guide: https://techguides.byui.edu/a/1152654-how-to-set-up-2-factor-authentication-on-a-mobile-phone. The Tesla Model S can go from 0 to 60 in about 4 seconds. That’s fast! But it is even faster to get a Duo Push which comes in about 2-3 seconds after you request it. And if you set the Push as your default way of authenticating, it will be sent to you the instant you log in to any of your BYU-Idaho accounts. It’s the quickest and easiest way to go about 2-FA. If you are having trouble getting a Push from Duo, check out our Tech Guides to troubleshoot the issues you might be having: https://techguides.byui.edu/a/1150250-i-didn-t-get-a-push-notification. Duo adds an extra layer of protection to your school account. It’s like locking your front door, and then also using a chain or lock bar. That extra layer may be what saves you if someone manages to steal your credentials and try to use them. Check out our Tech Guide to learn what to do if you get a Push when you’re not trying to log in: https://techguides.byui.edu/a/1219425-student-2fa-faqs#what-if-i-get-an-authentication-notice-when-i-m-not-trying-to-log-in-to-my-account. Is Duo giving you woes? Don’t worry; there are people who can help you! Call the I.T. Service Desk at (208) 496-1411, come visit us in the MC, or connect with us via the Live Chat feature on the BYU-Idaho website. You can even try using some of our Tech Guides for simple issues like not getting a Push when you request one: https://techguides.byui.edu/m/92156/c/308996
Transition from AnyConnect to GlobalProtect On Tuesday, March 16, the Cisco AnyConnect VPN will no longer be available for BYU-Idaho users and GlobalProtect will become the official VPN provider for BYU-Idaho. You are receiving this email because our records indicate that you are currently using the Cisco AnyConnect VPN. We are requesting that you start using the GlobalProtect VPN as soon as possible. GlobalProtect allows for more secure VPN connections and is easy to set up and use. To learn more about how to connect to the GlobalConnect VPN, please refer to our Tech Guides on the I.T. website: https://techguides.byui.edu/a/1286511-connecting-employee-computers-to-campus-through-a-virtual-private-network-vpn. If you have any other questions, or are having difficulties with connecting to the GlobalProtect VPN, please contact the I.T. Service Desk at (208) 496-1411. Thank you, Information Technology
Reminder Email Content As a reminder, the Cisco AnyConnect VPN will be going away on Tuesday, March 16. Set up GlobalProtect to continue connecting to the VPN. We appreciate your efforts in complying with these changes. If you need help with connecting to the GlobalProtect VPN, please refer to our Tech Guides: https://techguides.byui.edu/a/1286511-connecting-employee-computers-to-campus-through-a-virtual-private-network-vpn. Or if you need more help, contact the I.T. Service Desk at (208) 496-1411. Thank you, Information Technology
News Writing
A selection of weekly news articles and employee announcements written for the BYU–Idaho IT Department newsletter. I focused on summarizing emerging tech, platform updates, and cybersecurity trends for both technical and non-technical audiences.
New Zealand Testing Wireless Power Transmission A company in New Zealand is testing the ability to send electricity through the air, wirelessly. If it is successful, it could mean the end of sending electricity via copper wires and could simplify the energy transmission process. With one power antenna, the company could safely send energy over thousands of kilometers because the technology relies only on the antenna being in line of sight of the next antenna. If you would like to learn more about this advancing technology, check out the article here [LINK] from NewAtlas.
SpaceX’s “Starlink” Internet Service in Beta Testing In a recent release from SpaceX, the company reported that their new Starlink Internet service is in beta testing. Their satellite-based service is testing excellently, and has little to no latency, and is even able to offer download speeds of up to 100 Mbps. This new technology has the potential to help those in rural locations or in areas with spotty connection get access to high-speed internet. To learn more, read this article [LINK] from TechCrunch.
NVIDIA Making Video Conferencing Better The computer graphics company, NVIDIA, has recently unveiled a new project, an AI system named Maxine that aims to improve the quality of video conferencing calls. The service is entirely cloud-based, making it easier on computer hardware. Some of their services include resolution upscaling (which would take a 360p video stream and upscale it to 720p, making the call look crisper), face reorientation (which would scan your face and make it look like you are always looking at the camera, even if you are looking off screen), and many others as well. NVIDIA’s AI also has the potential to collaborate with other video conferencing platforms like Zoom, Skype, and Google Meet to improve upon their current features, and include some new ones as well. If you would like to learn more about this, check out this article [LINK] from Engadget.com.
Trial Brain Implant that Controls Computers is Successful In a recent study by the University of Melbourne, they have created a brain implant that translates thought into measurable action on a computer and has proved successful in its first trials. The implant, which is no bigger than a matchstick, is supposed to help those who are suffering from neurological disabilities, and allow them lead normal, full lives. It is inserted into a blood vessel to rest over the test subject’s motor cortex and allows them to think about certain actions, like moving their left foot, in order to translate that into a predetermined action on a computer, like clicking the mouse, or scrolling. If you’d like to learn more about this, check out this article [LINK] from NewAtlas.
Microsoft’s Underwater Data Center Resurfaces After 2 Years Microsoft engineered a data center that they submerged off the coast of Orkney, Scotland for two years. When it was retrieved, they found that only eight of the nearly 900 servers had failed. Microsoft said that if they had the same number of servers on land, the rate of failure would have been about eight times as much. Because more information is moving to the cloud, the need for data centers is greater now than ever. Unfortunately, it is hard to find room for facilities that also offer a safe space because natural wear and preventable accidents can lead to the loss of server banks. Discoveries like this once could mean that Microsoft, and other companies worldwide could one day move more of their centers off-site and to remote locations to help save costs. To read more about this, check out this article [LINK] from the BBC.
Blog & Long-Form Writing
A selection of blog posts and informational content pieces crafted with SEO strategy, voice consistency, and reader engagement in mind. Includes both editorial Q&A and consumer-facing writing.
Title: “What’s New in the IT Handbook?” – Blog Post Q&A Role: Technical Copywriter, BYU-Idaho IT Department Summary: Wrote a friendly, accessible Q&A blog post to drive awareness around internal documentation updates. Synthesized technical feedback into reader-friendly content for IT employees, with a clear tone and scannable structure. Highlights: Translated technical edits into engaging copy. Encouraged feedback loops and internal documentation hygiene. Promoted self-service and user ownership. What’s New in the IT Handbook? Since the IT Handbook was launched earlier this year, there have been several feedback tickets submitted through the “Provide Feedback” section of the handbook. This led to IT Handbook updates about trainings, processes, and collaboration. Look at how the IT Handbook has progressed to better serve IT since your feedback: Q: I was looking at the FAQ in the handbook, and it was tough to read the titles in the boxes since they were truncated. Would it be possible to enlarge the boxes so I could read more of the titles? A: As a result of this request, the visual look of section titles in the IT Handbook were changed to make them easier to read. Q: The “Welcoming a new employee” section made me think of Onboarding. Maybe we should have a reference or link here (in section 3.2.9) to the Onboarding section of the handbook. A: Section 3.2.9 now links to our Onboarding section in the IT Handbook. You can see this change by going to section 3.2.9, "Welcoming a New Employee." Q: It looks like there's a typo on the title of 6.1.1. It says, "Desert Mutual Benefit Administrators" and I think it's supposed to be "Deseret." A: Thankfully, this typo was caught. The spelling was changed to be grammatically correct. Q: I couldn't find anything about reserving the 170-Conference room or collaboration rooms in Outlook. It might also be helpful to include how to check if the room is scheduled already. A: This new section can be found in the IT Handbook by going to section 3.1.20, "Schedule a Calendar-Enabled Room." Q: Under section 9.3.10, “How do I fax?” I think it would be helpful to link out to this page in that section. Someone mentioned faxing and I had to search for the information. It would be easier to link out in the IT Handbook. A: This section has been edited and the updated section can be found by going to section 9.3.10, "Where do I fax?" Q: In section 3.1.13, “Requesting Communication Help,” it explains communicating “a change, initiative, project, or event,” but it isn't explicit about what that means. Could we add more information about the necessity of going through the Communications team? A: If you have any questions about the kinds of things that the IT Communications team can do, visit section 3.1.13, "Requesting Communication Help." Q: The IT Handbook mentions IT Connect and that readers can find archived copies on the "IT Communications site." Could we add a direct link to the archive? A: There is now a link to the IT Connect archives in section 4.1.3, "IT Connect." Q: The IT Guiding Principles have been updated. Can we update the content and include the video that was created for the Winter 2019 IT Department Meeting? A: This section of the IT Handbook has been updated to include the new IT Guiding Principles, and a link to the video. You can see the updates by going to section 1.1.2, "Guiding Principles." Q: Is there a section about how to view the roles that are assigned to you or how to gain access to roles that you need to be assigned to once you get hired or start a new position? A: We have created a new section that details the process on how IT employees go about getting assigned to roles. You can see this updated section by going to section 3.1.21, "Requesting Roles." Thanks to the curiosity of IT employees, the IT Handbook is getting better every day. It can only improve with your feedback. If you notice something has changed or is missing, please fill out an IT Handbook Feedback Ticket. Your response and participation make a big difference for other employees.
Title: “Are Mermaid Tails Safe for Kids?” – SEO Blog Article Role: Freelance Writer, Fin Fun Summary: Crafted a keyword-optimized FAQ blog designed to educate parents while increasing visibility in Google search. Wrote with empathy, clarity, and gentle authority, supporting both safety messaging and brand positioning. Highlights: Targeted SEO terms like “mermaid tail safety” and “swimmable mermaid tail.” Anticipated and answered high-intent parent concerns Supported product trust while promoting responsible use Are Mermaid Tails Safe for Kids? For many children, the desire to be a mermaid starts young. With a swimmable mermaid tail, those desires can become a reality. But some parents, like yourself, could be hesitant about allowing their children to use one, and you could be wondering, “Are mermaid tails safe for kids?” Here are the answers to a lot of the common questions about mermaid tail safety that many parents have before they purchase a swimmable mermaid tail for their child: Q: What is the tail made of? A: A mermaid tail comes in two parts, the monofin which is made of polypropylene and hooks on the feet and secures behind the heels. The other half is a breathable fabric or neoprene slipcover that goes over the monofin and up to the waist to complete the look. This is called a mermaid tail skin. Water can flow easily in and out of the mermaid tail skin, which shouldn’t hinder the abilities of a capable swimmer. Q: How can I tell if my child is a capable swimmer? A: To ensure that your child is a capable swimmer, you should enroll them in swimming classes for kids so they can learn basic swimming skills. Most swim class teachers will be able to decide the point when your child has reached the “capable” level. This also usually happens around the age of six if the child regularly practices swimming skills. Q: Do I have to be present while my child swims and is it OK to have other people or children swimming with them at the same time? A: It is important though that no matter the age of your merperson that they are supervised at all times when using their monofin. And it helps to have another child about the same age who can be there in the pool, with or without a mermaid tail of their own, who is also a capable swimmer and can swim with them to offer support if needed. Q: What should I check with my child before they swim with their tail for the first time? A: First, some children think that because they have the mermaid tail that they can also breathe underwater like a mermaid. Gills unfortunately are not included with their mermaid tail, so they should understand that if they need to breathe, that they still need to come to the surface. Next, they should understand that swimming like a mermaid isn’t easy. It takes a lot of coordination and practice to be good at it. If they don’t get it right away, keep on encouraging them. It may be hard to swim like a mermaid right away, but it is easy to pick up. Lastly, when they get tired swimming with the tail, it is OK, and they can still keep swimming. They should just roll over onto their back and float until they feel rested enough to keep swimming. These aspects make up a large part of what mermaid tail and swim safety is. Q: Are mermaid tails allowed in public pools? A: A lot of that depends on the pool. If mermaid tails are strictly prohibited at your public pool, it will probably be listed in the rules. Be sure to consult whatever rules might be there before your little one slips into their fin at the public pool. Q: In an emergency, how hard is it to remove the mermaid tail? A: There are many things that could happen, like the monofin slipping off, too much water accumulating in the tail skin and causing drag, or if they could just simply get scared. It’s OK, but it is important to cover the removal process before they enter the pool. To remove the tail in an emergency situation, the child should scissor kick by bringing one foot up to the opposite knee, and once their foot is free, they should use it to kick off the rest of the monofin from their other heel. Then they should carefully peel the mermaid tail skin off their waist and legs and swim out. Q: What is the proper way to care and treat the mermaid tail skin? A: The mermaid tail skin is machine washable since it is made of the same material as swimsuits. However, a word of caution, the mermaid tail skin can’t hold up to the coarse material that pool decks are made of. Mermaid tails should be put on and removed at the side of the pool. Once the whole tail is on, your child can slide into the water. It is discouraged to jump into a pool while wearing the mermaid tail. The monofin causes a much larger splash, which can affect people around them, and it can also cause the monofin to slip off their feet, or cause drag, which can flip them upside down in the water, disorienting them. This is the last aspect to understand about mermaid tail and swim safety before your child dons their flippers for the first time. If you are confident that you can answer all of these questions for your child, then there should be no problem in allowing them to have a swimmable mermaid tail. In fact, you should be able to decide confidently after reviewing these questions and answers whether or not mermaid tails are safe for kids or not. So, just sit back and let them have a “whale” of a time.